Adding new allele sequence definitions
Single allele
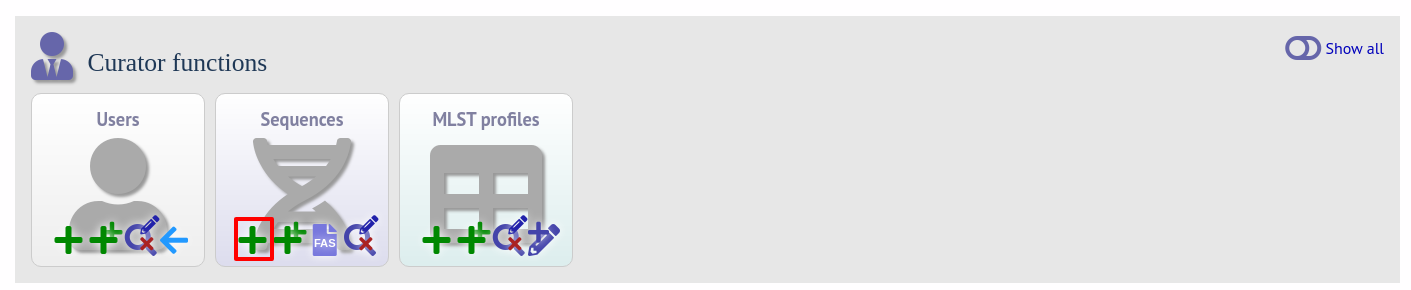
To add a single new allele, click the sequences add (+) link on the curator’s main page.
Select the locus from the dropdown list box. The next available allele id will be entered automatically (if the allele id format is set to integer). Paste the sequence in to form, set the status and select the sender name from the dropdown box. If the sender does not appear in the box, you will need to add them to the registered users.
The status reflects the level of curation that the curator has done personally - the curator should not rely on assurances from the submitter. The status can either be:
Sanger trace checked
Sequence trace files have been assembled and inspected by the curator.
WGS: manual extract (BIGSdb)
The sequence has been extracted manually from a BIGSdb database by the curator . There may be some manual intervention to identify the start and stop sites of the sequence.
WGS: automated extract (BIGSdb)
The sequences have been generated by a BIGSdb tag scanning run and have had no manual inspection or intervention.
WGS: visually checked
Short read data has been inspected visually using an alignment program by the curator.
WGS: automatically checked
The sequences have been checked by an automated algorithm that assesses the quality of the data to ensure it meets specified criteria.
unchecked
If none of the above match, then the sequence should be entered as unchecked.
You can also choose whether to designate the sequence as a type allele or not. Type alleles can be used to constrain the sequence search space when defining new alleles using the web-based scanner or offline auto allele definer.
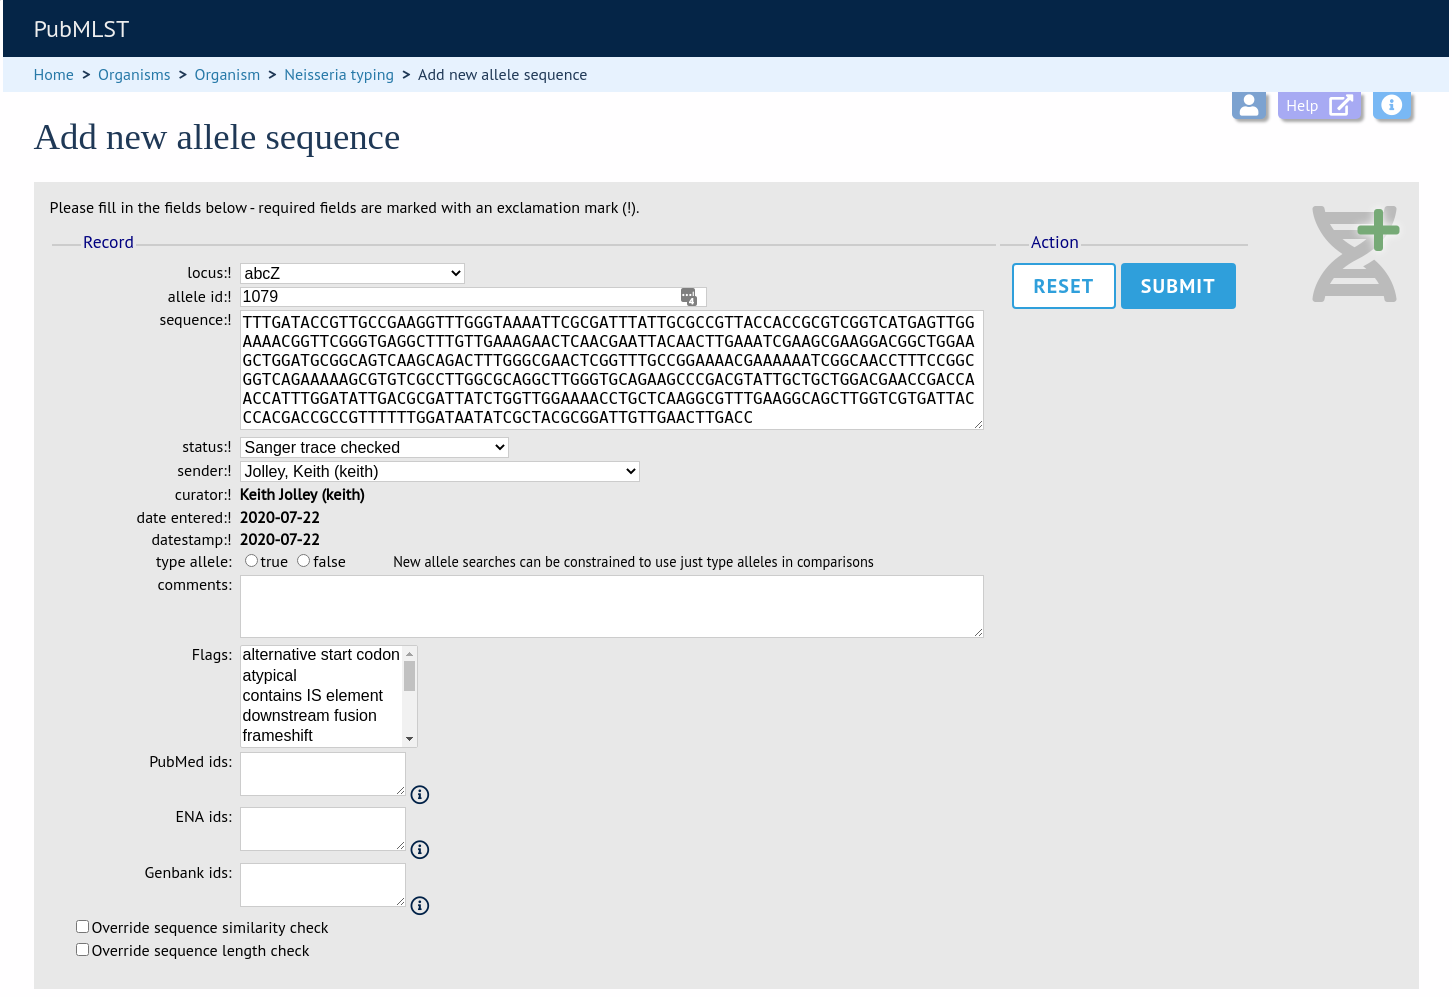
Press submit. By default, the system will test whether your sequence is similar enough to existing alleles defined for that locus. The sequence will be rejected if it isn’t considered similar enough. This test can be overridden by checking the ‘Override sequence similarity check’ checkbox at the bottom. It will also check that the sequence length is within the allowed range for that locus. These checks can also be overridden by checking the ‘Override sequence length check’ checkbox, allowing the addition of unusual length alleles.
See also
Sequences can also be associated with PubMed, ENA or Genbank id numbers by entering these as lists (one value per line) in the appropriate form box.
Batch adding multiple alleles
There are two methods of batch adding alleles. You can either upload a spreadsheet with all fields in tabular format, or you can upload a FASTA file provided all sequences are for the same locus and have the same status.
Upload using a spreadsheet
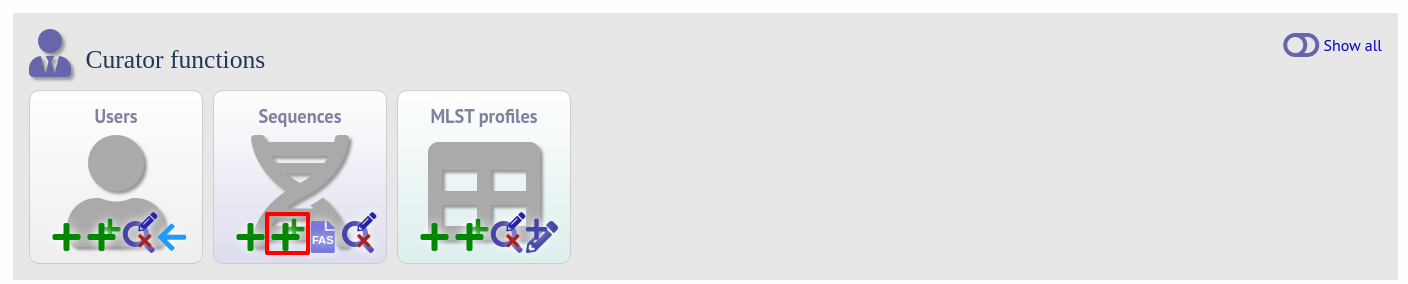
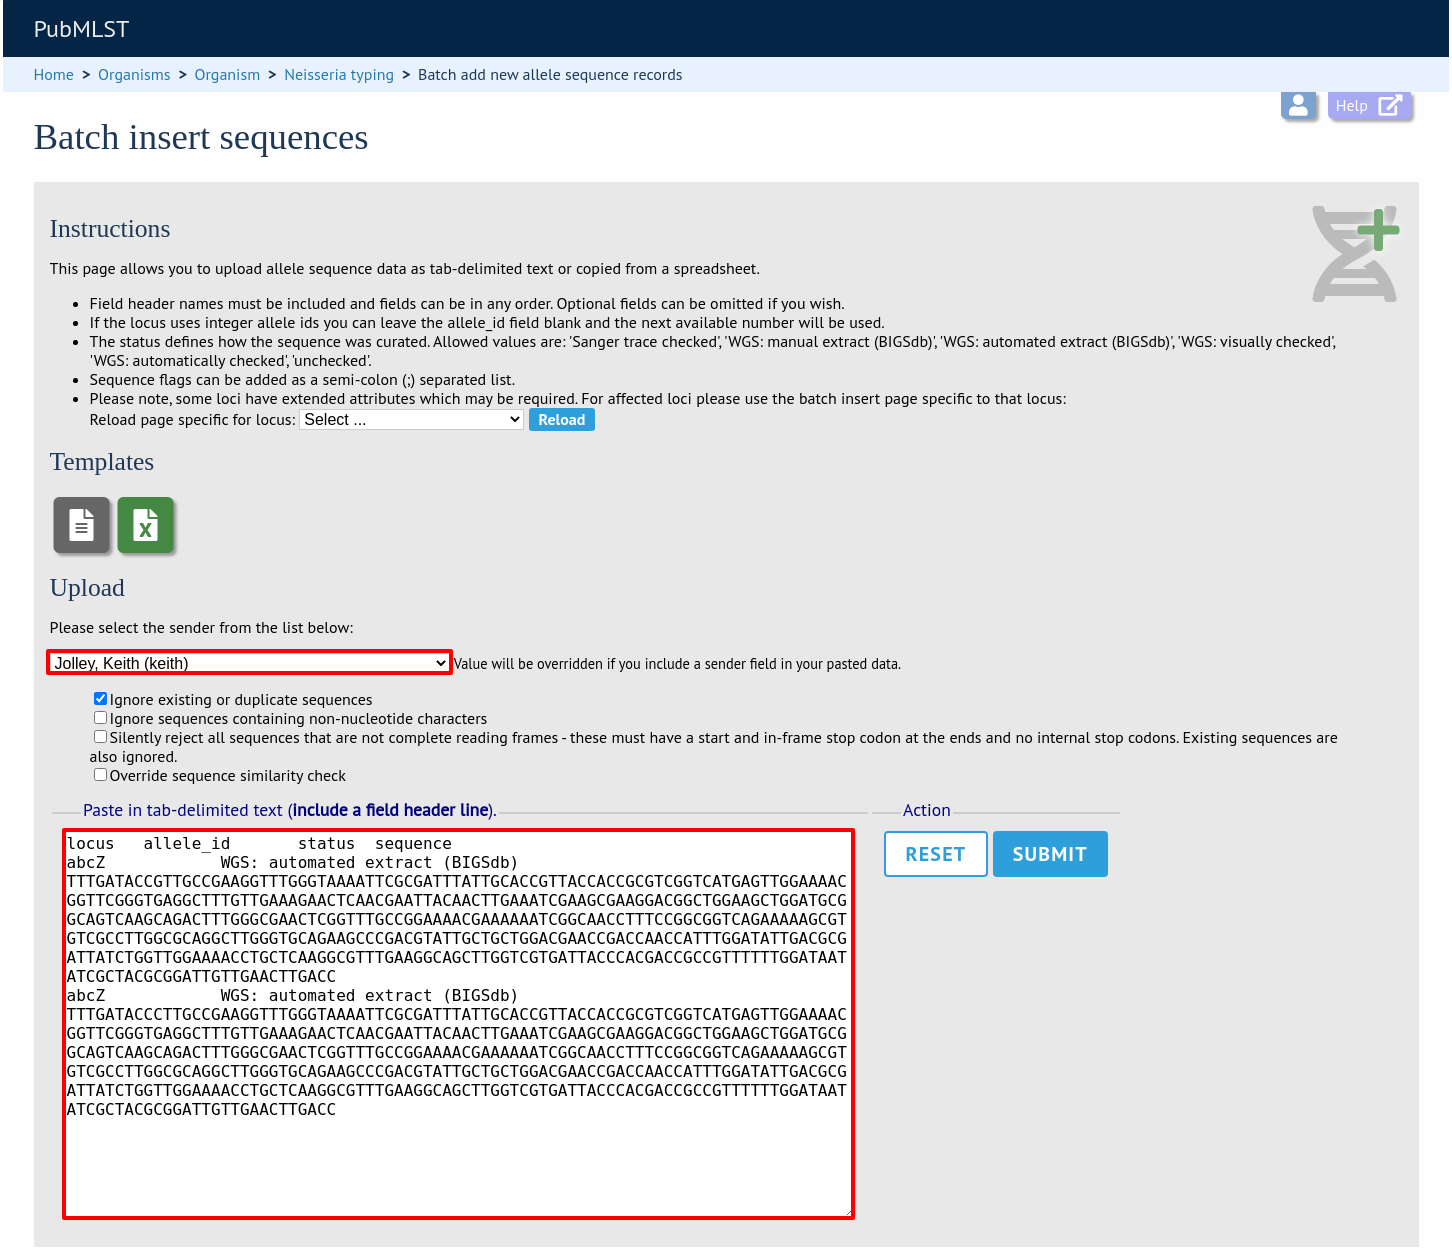
Click the batch add (++) sequences link on the curator’s main page.
Download a template Excel file from the following page.

Note
A tab-delimited text file in the required format for batch uploading is created if new alleles are found when running the web-based sequence tagging.
Fill in the spreadsheet. If the locus uses integer allele identifiers, the allele_id can be left blank and the next available number will be used automatically.
The status can be either: ‘Sanger trace checked’, ‘WGS: manual extract (BIGSdb)’, ‘WGS: automated extract (BIGSdb)’, ‘WGS: visually checked’, ‘WGS: automatically checked’ or ‘unchecked’. See full explanations for these in the single allele upload section.
The ‘type_allele’ field is boolean (true/false) and specifies if the sequence should be considered as a type allele. These can be used to constrain the sequence search space when defining new alleles using the web-based scanner or offline auto allele definer.
Paste the entire sheet in to the web form and select the sender from the dropdown box.
Additionally, there are a number of options available. Some of these will ignore sequences if they don’t match certain criteria - this is useful when sequence data has been extracted from genomes automatically. Available options are:
Ignore existing or duplicate sequences.
Ignore sequences containing non-nucleotide characters.
Silently reject all sequences that are not complete reading frames - these must have a start and in-frame stop codon at the ends and no internal stop codons. Existing sequences are also ignored.
Silently reject sequences that fail similarity check.
Override sequence similarity check.
Silently reject sequences that fail length check.
Override sequence length check.
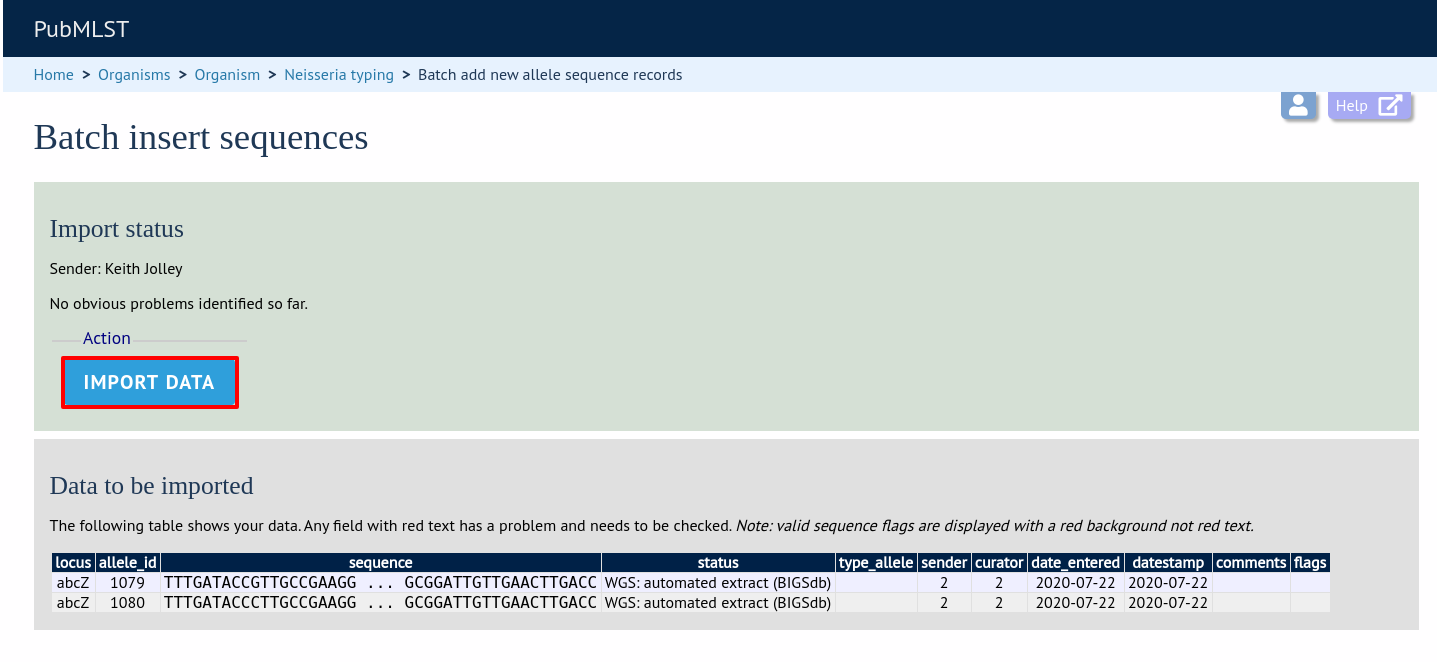
Press submit. You will be presented with a page indicating what data will be uploaded. This gives you a chance to back out of the upload. Click ‘Import data’.
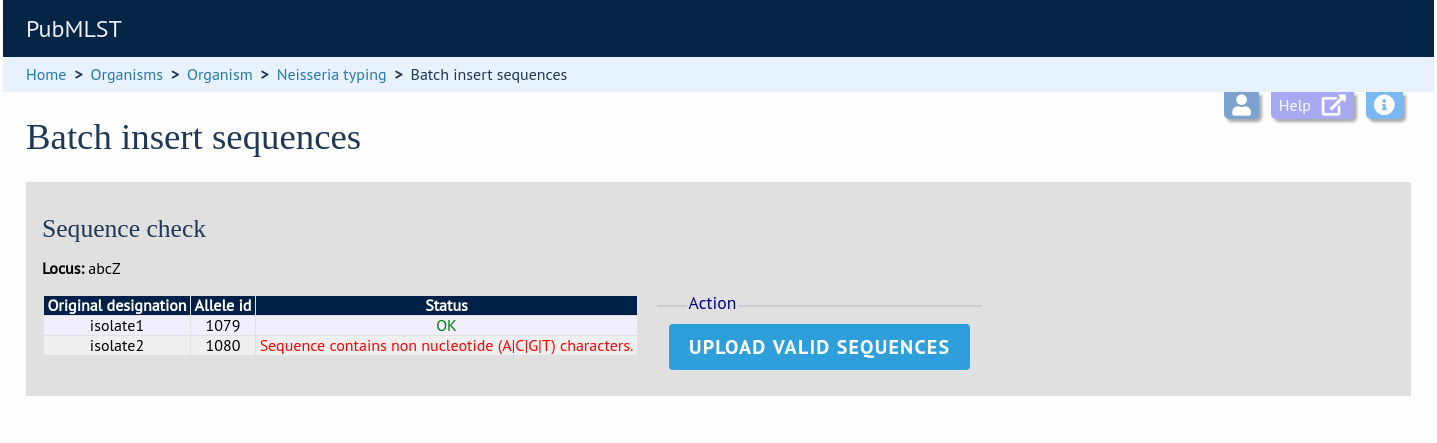
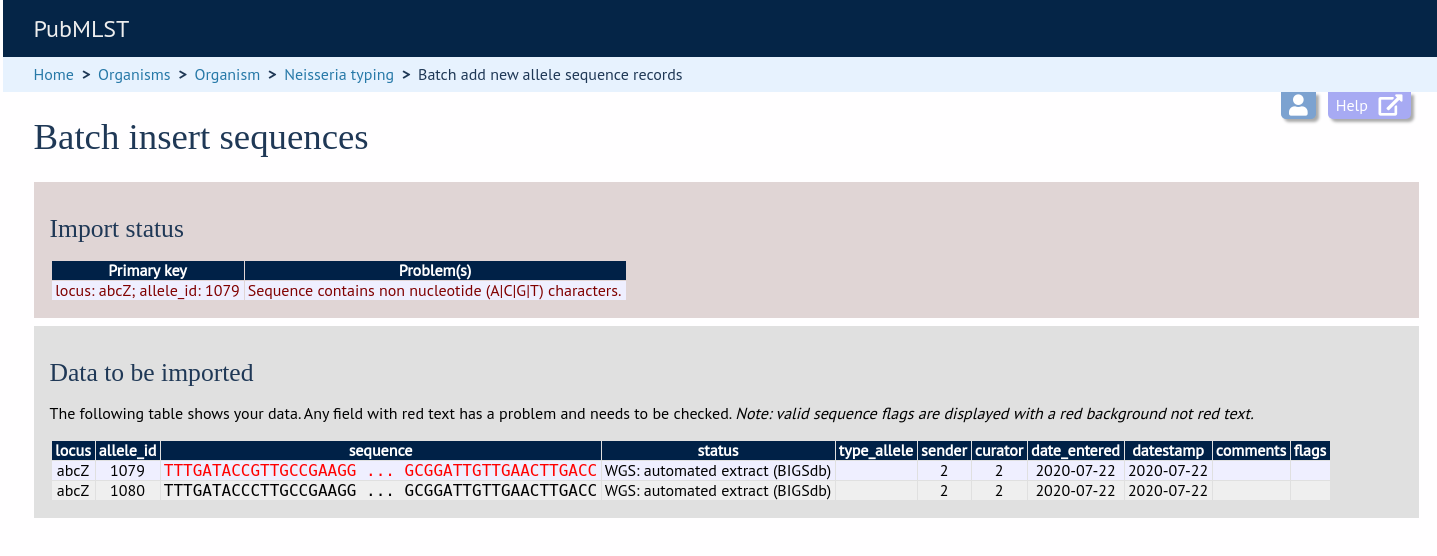
If there are any problems with the submission, these should be indicated at this stage, e.g.:
Upload using a FASTA file
Uploading new alleles from a FASTA file is usually more straightforward than generating an Excel sheet.
Click ‘FASTA’ upload on the curator’s contents page.

Select the locus, status and sender from the dropdown boxes and paste in the new sequences in FASTA format.
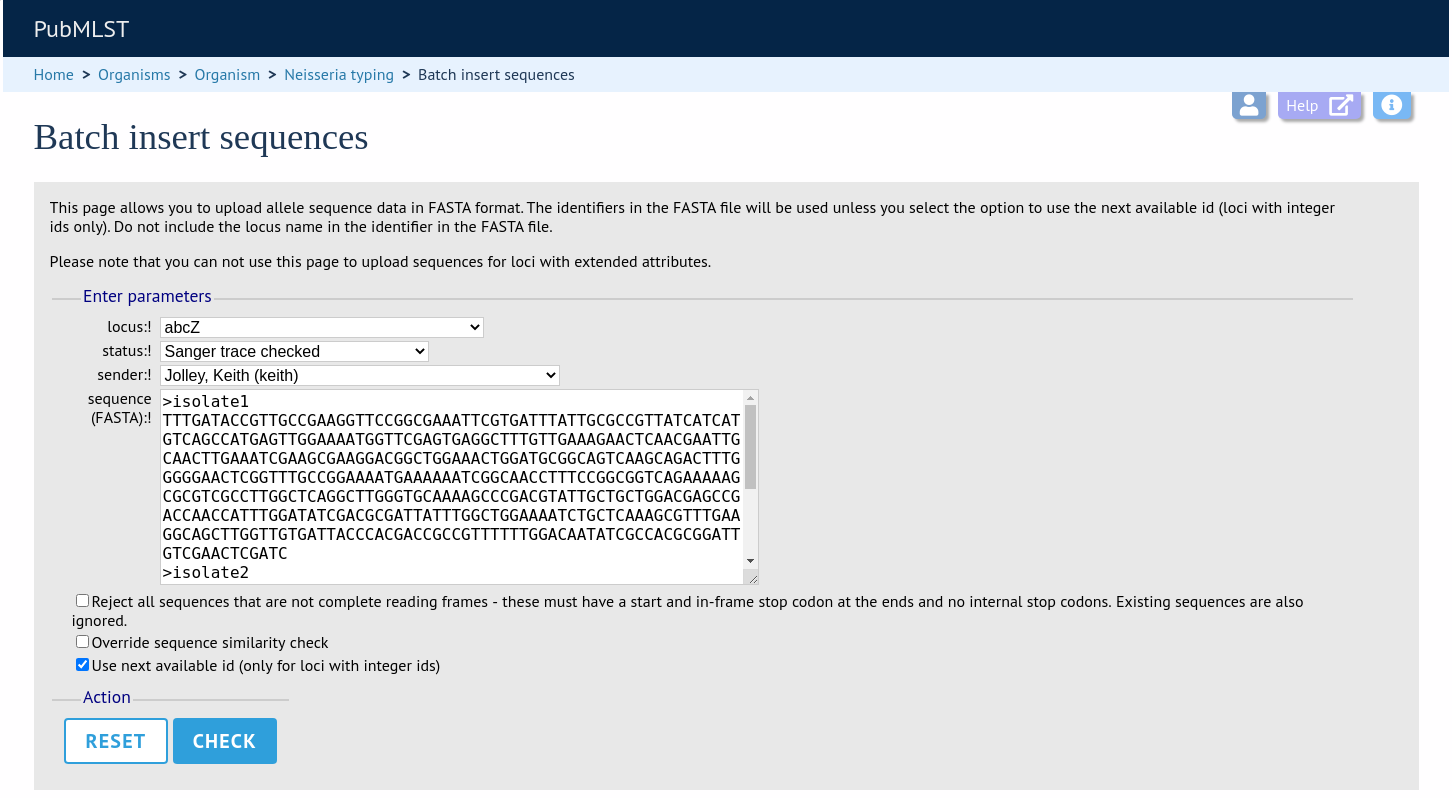
For loci with integer ids, the next available id number will be used by default (and the identifier in the FASTA file will be ignored). Alternatively, you can indicate the allele identifier within the FASTA file (do not include the locus name in this identifier).
As with the spreadsheet upload, you can select options to ignore selected sequences if they don’t match specific criteria.
Click ‘Check’.
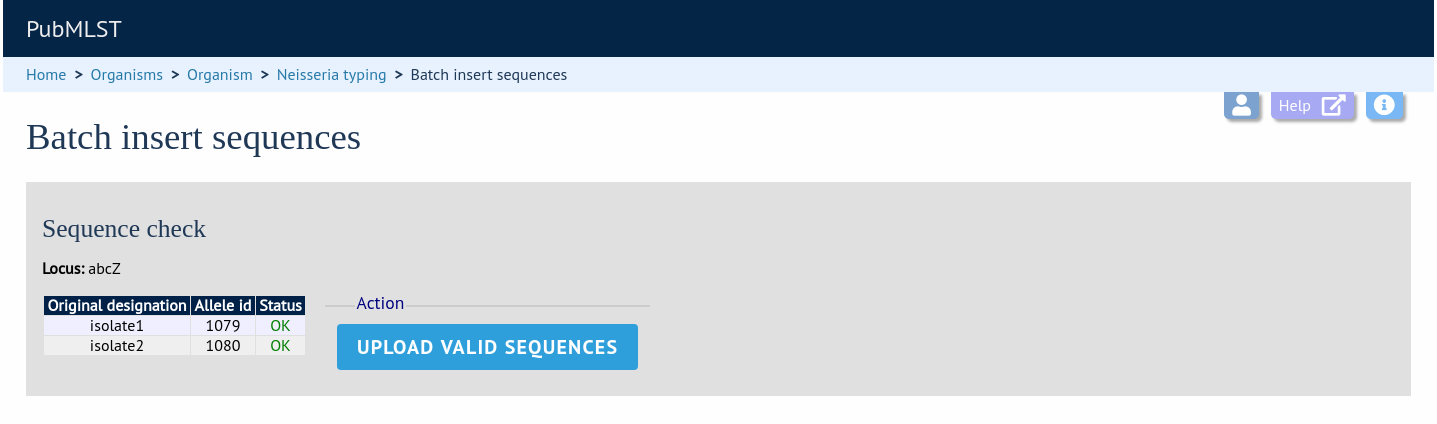
The sequences will be checked. You will be presented with a page indicating what data will be uploaded. This gives you a chance to back out of the upload. Click ‘Upload valid sequences’.
Any invalid sequences will be indicated in this confirmation page and these will not be uploaded (you can still upload the others), e.g.